> ## Documentation Index
> Fetch the complete documentation index at: https://dify-6c0370d8-agent-add-ai-credits-doc.mintlify.site/llms.txt
> Use this file to discover all available pages before exploring further.
# Model Providers
> Use models with your AI credits, or connect your own provider accounts and API keys
Models power many of the apps and features you build in Dify. Dify Cloud provides two ways to access them: use supported models with the AI credits included in your plan, or add your own API key to connect a provider account.
Models available through either option can be used across the workspace.
## Use AI Credits
With AI credits, you can use supported models from different providers without adding API keys. Install one of these providers from **Integrations** > **Model Provider** (or the [Marketplace](https://marketplace.dify.ai/)), and its models are ready to use.
See [AI Credits](/en/cloud/use-dify/workspace/ai-credits) for credit costs and usage rules.
## Use Your Own API Key
Add your own API key to access models through your provider account.
Only the workspace owner and admins can add or manage provider API keys.
1. Go to **Integrations** > **Model Provider**.
2. Find the provider. If it is not installed, select it under **Install model providers** or find it in the [Marketplace](https://marketplace.dify.ai/).
3. Click **Add API Key**, then enter your API key and any other required details.
If the provider supports AI credits, both options remain available. Set [Usage Priority](/en/cloud/use-dify/workspace/ai-credits#set-usage-priority) to choose which one is used first.
Requests made with your API key go through your provider account and do not deduct AI credits. For providers that do not support AI credits, an API key is the only option.
## Add a Custom Model
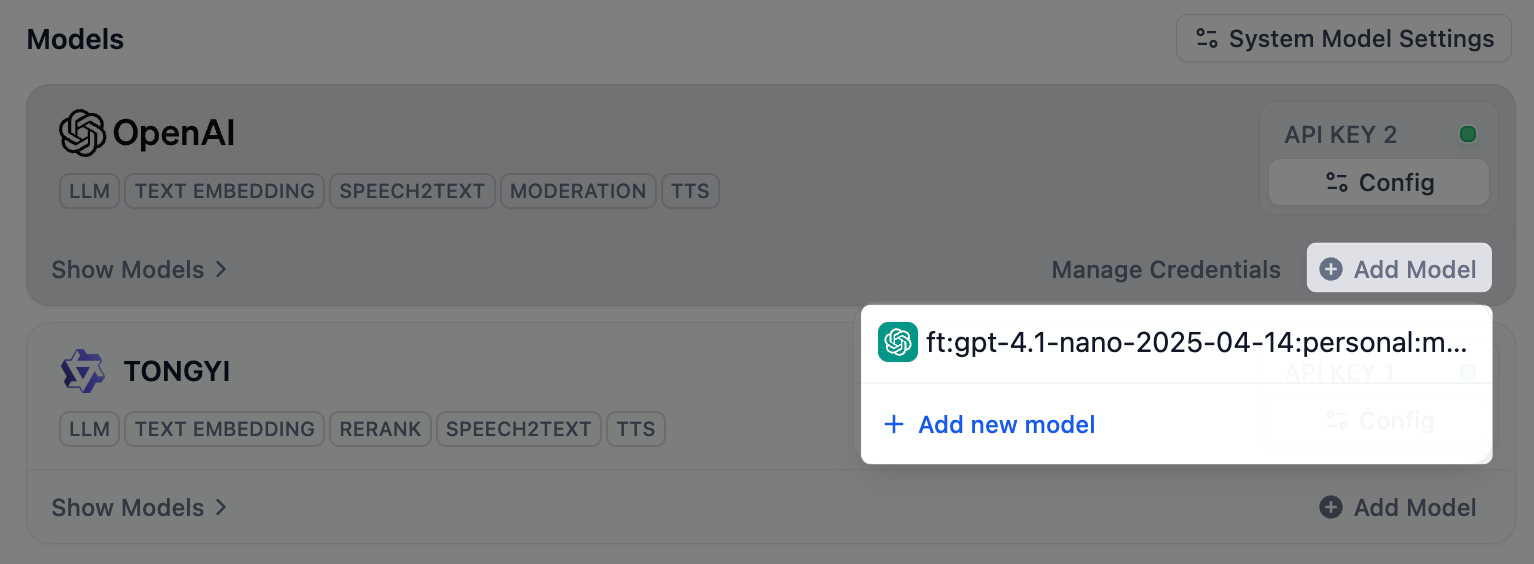
A provider's models are ready as soon as you connect it, so you only add one by hand when the model you need isn't listed, such as a brand-new or fine-tuned model.
Click **Add Model** on the provider's card, then give the model a name and its credentials. Providers that serve only a fixed set of models don't offer this option.
If the model you add matches the name and type of an existing one, Dify attaches the new API key to that model instead of creating a duplicate.
## Choose the Models Apps Use by Default
Apps and nodes that don't pick a model fall back to your workspace defaults. Click **Default Models** at the top-right corner to set one for each job:
* **System Reasoning Model**: the default for general LLM tasks.
* **Embedding Model**: indexes and retrieves knowledge base content.
* **Rerank Model**: reorders retrieval results by relevance.
* **Speech-to-Text Model**: turns audio into text.
* **Text-to-Speech Model**: turns text into audio.
## Manage API Keys
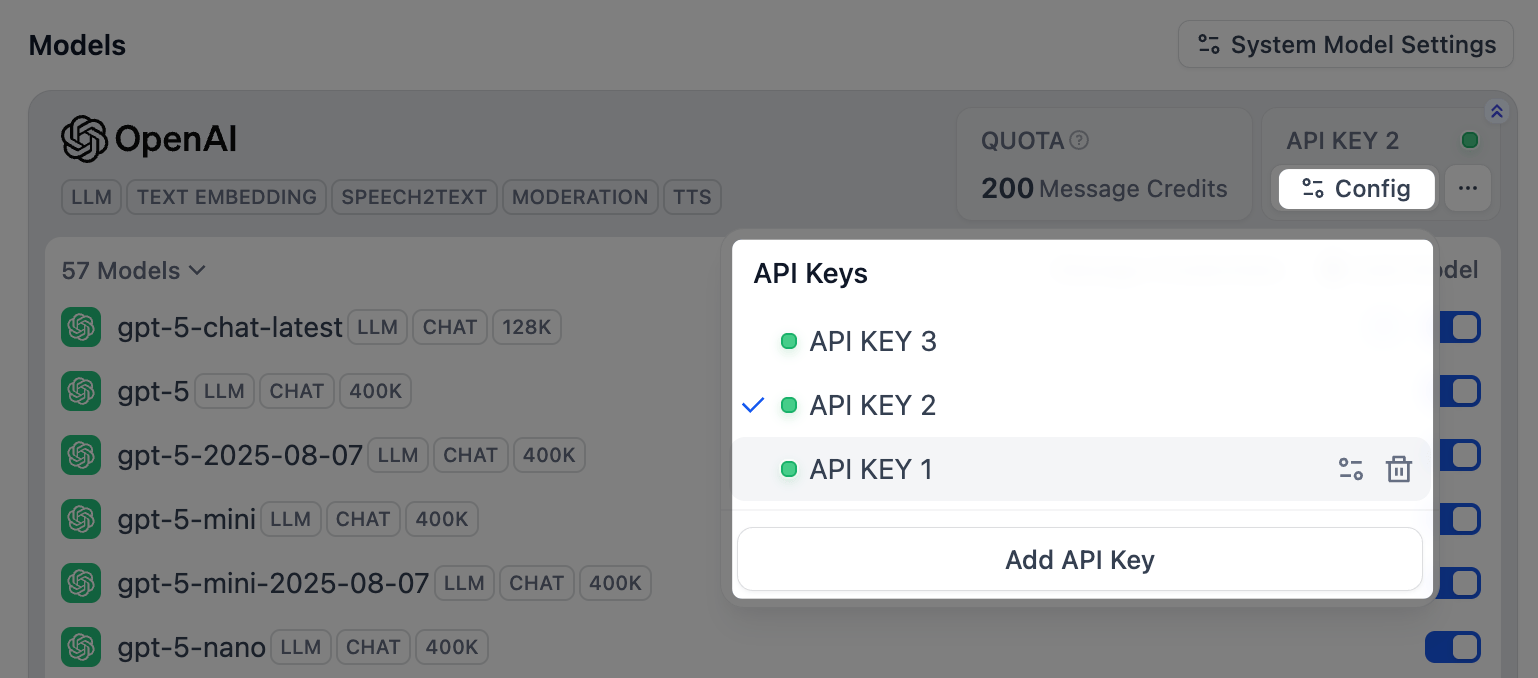
Add more than one API key to a provider when you need to switch between provider accounts or configure load balancing for a model.
* For the models listed on a provider card, click **Configure** on the card to manage the API keys they share.
 * For a custom model you added, click **Configure** on that model to manage its own API keys.

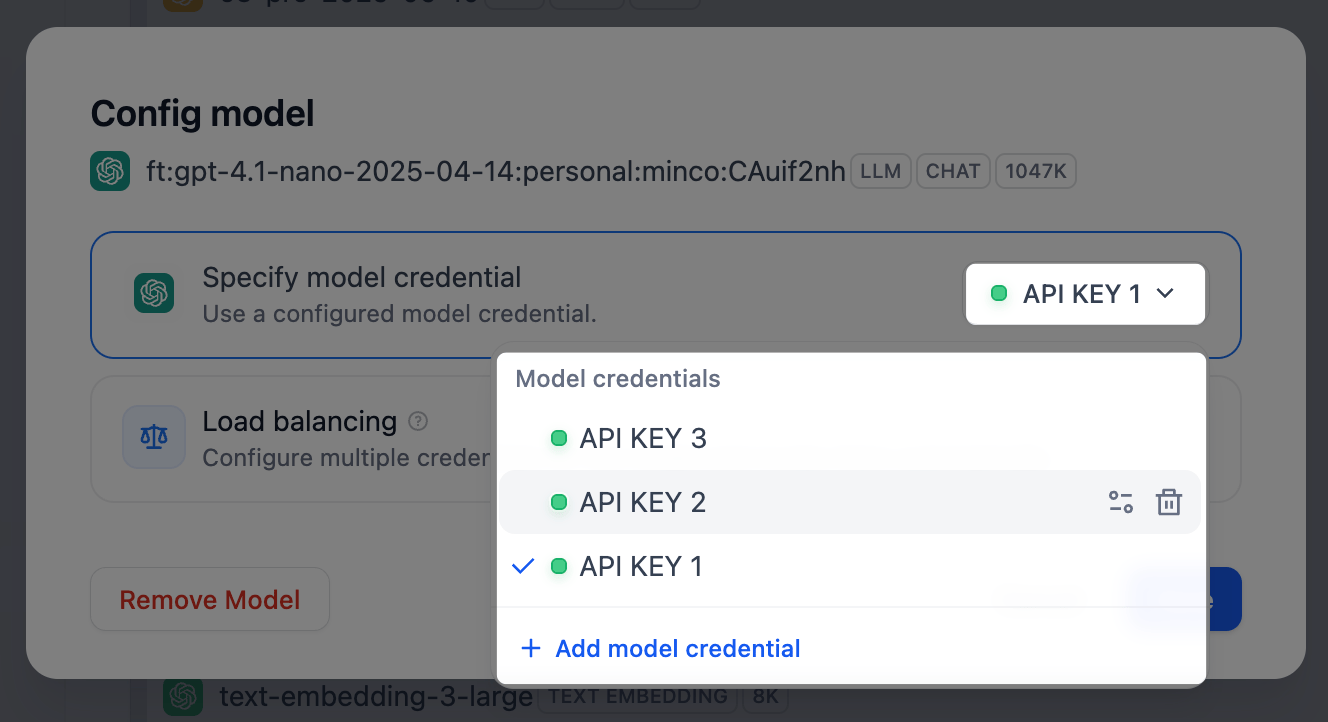 A custom model relies on its own API keys. Deleting its only API key removes the model too.
To view every custom model's API keys in one place, click **Manage Credentials** on the provider card.
A custom model relies on its own API keys. Deleting its only API key removes the model too.
To view every custom model's API keys in one place, click **Manage Credentials** on the provider card.
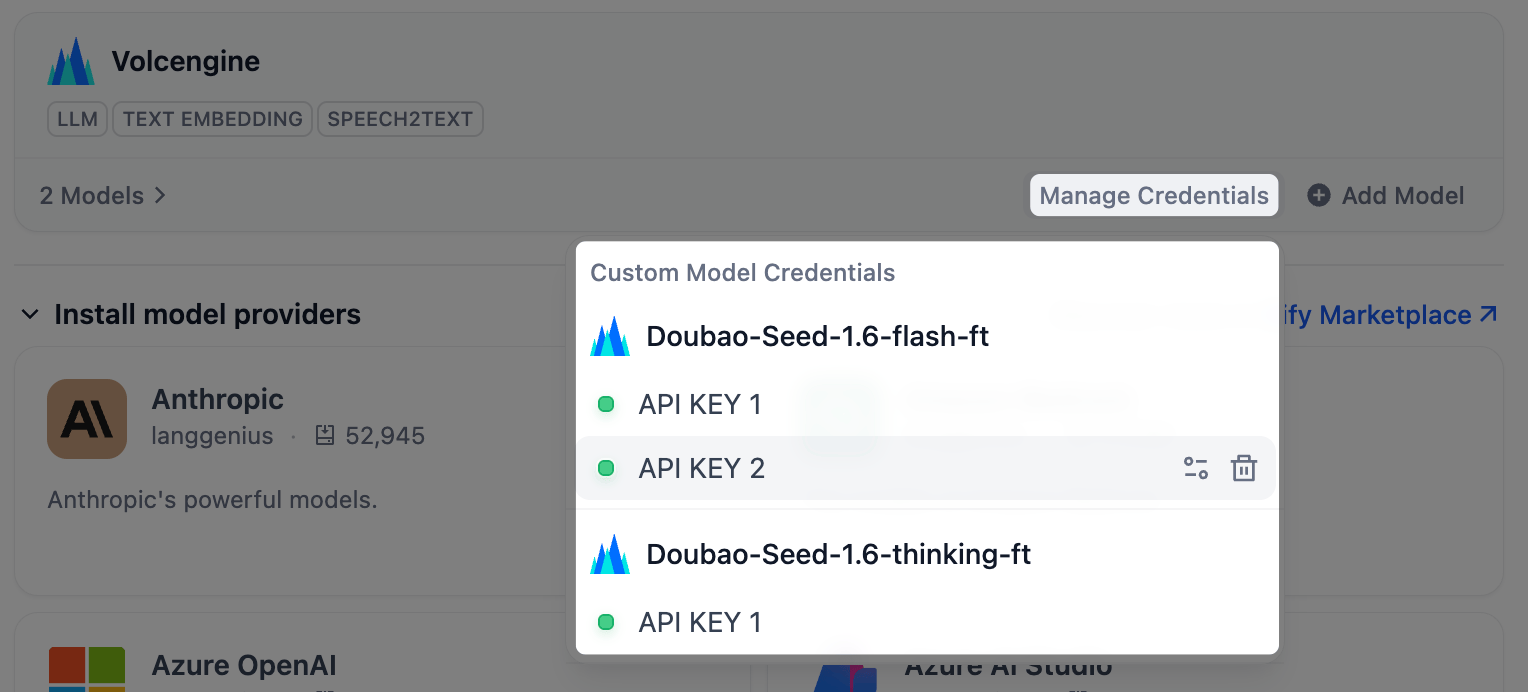 API keys stay here even after the custom model is removed, so you can re-add the model later without re-entering them.
 ## Spread Requests Across API Keys with Load Balancing Professional Team
When one API key handles many requests at once, it can hit the provider's rate limit and start failing.
Use load balancing to spread requests across several API keys for the same model, so no single API key becomes the bottleneck. Dify rotates through the API keys in turn and rests any that hits its limit for a minute before trying it again.
1. Find the model in the list, click **Configure**, and select **Load balancing**.
2. Click **Add credential** to add API keys to the pool.
Add a higher-quota or faster API key more than once to send more of the traffic its way.
## Spread Requests Across API Keys with Load Balancing Professional Team
When one API key handles many requests at once, it can hit the provider's rate limit and start failing.
Use load balancing to spread requests across several API keys for the same model, so no single API key becomes the bottleneck. Dify rotates through the API keys in turn and rests any that hits its limit for a minute before trying it again.
1. Find the model in the list, click **Configure**, and select **Load balancing**.
2. Click **Add credential** to add API keys to the pool.
Add a higher-quota or faster API key more than once to send more of the traffic its way.
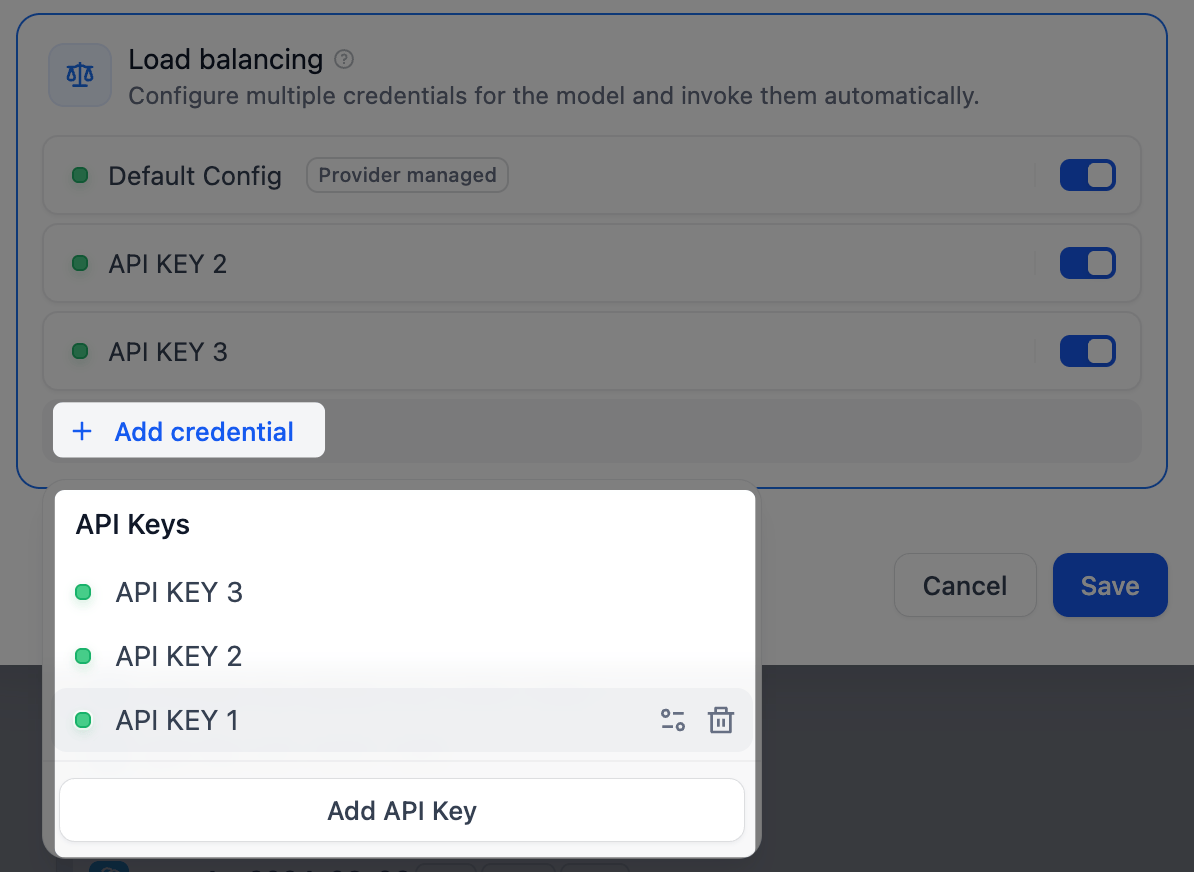 3. Turn on at least two API keys, then click **Save**. A model using load balancing shows a marker in the list.
Switch back to a single API key anytime; your load balancing setup is kept for later use.
3. Turn on at least two API keys, then click **Save**. A model using load balancing shows a marker in the list.
Switch back to a single API key anytime; your load balancing setup is kept for later use.